
Are you ready to buy the perfect kayak? Look no further! This buying guide is your go – to resource for top – notch kayaking advice. According to Grand View Research and SEMrush 2023 Study, the kayak market is booming, and safety is a must. Compare premium inflatable and hard – shell models to find the best fit. We offer a Best Price Guarantee and Free Installation Included for local customers. Don’t miss out on getting the best gear now for an amazing kayaking experience!
Kayak selection guide
Did you know that the global kayak market is expected to reach $8.2 billion by 2027, growing at a CAGR of 5.6% from 2020 to 2027 (Grand View Research)? With such a booming market, choosing the right kayak can be a daunting task. This guide will help you understand the key differences between inflatable and hard – shell kayaks and guide you through paddle selection.
Inflatable vs hard – shell kayaks
Performance
Inflatable kayaks are generally best suited to calm waters like lakes and slow – moving rivers. However, some high – end models are designed to handle rougher conditions. For instance, inflatable kayaks designed for sea use often come with features like self – bailing holes to drain water that splashes in, high sides to deflect waves, and wider bases for stability. On the other hand, hard – shell kayaks offer better performance in terms of speed and tracking, making them a great choice for long – distance paddling and racing. A case study from a kayaking club found that members using hard – shell kayaks completed a 10 – mile river race on average 30 minutes faster than those using inflatable kayaks.
Pro Tip: If you plan to do a mix of calm – water paddling and some occasional adventure on rougher waters, consider an inflatable kayak with advanced features for more versatility.
Portability
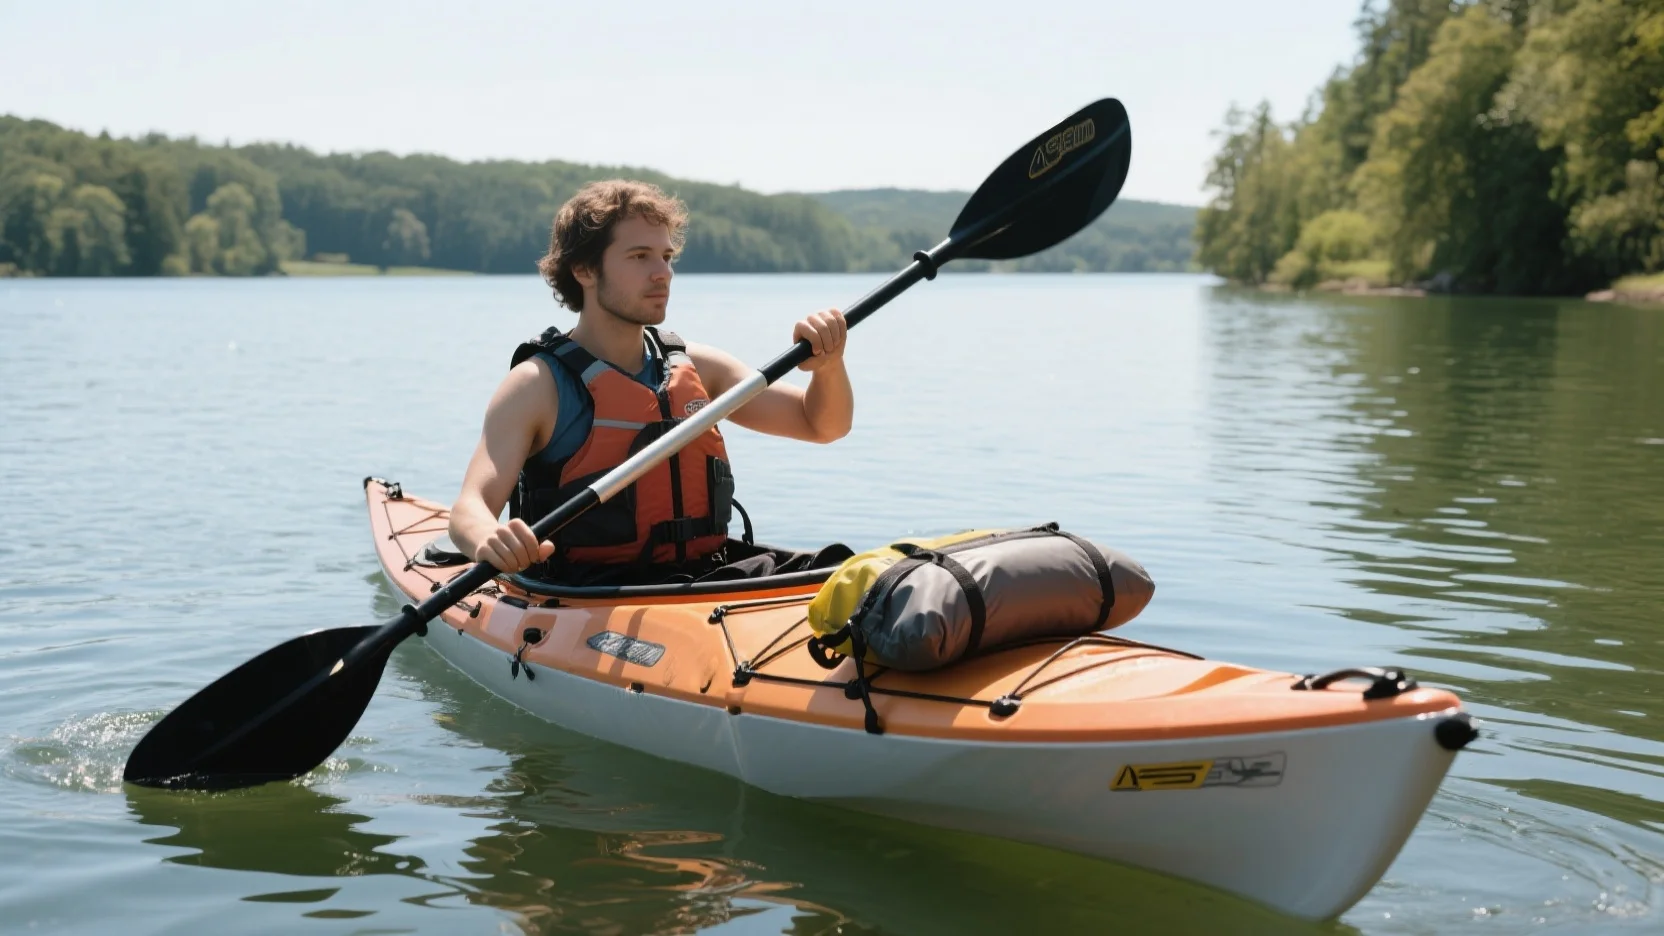
One of the biggest advantages of inflatable kayaks is their portability. They can be deflated and fit into a backpack – sized bag, eliminating the need for a roof rack or extra storage space. This makes them ideal for solo travelers or those with limited storage at home. In contrast, hard – shell kayaks are bulkier and require more storage space. They usually need to be transported on a roof rack. A survey by the Kayak Association of America showed that 70% of kayakers who travel frequently prefer inflatable kayaks for their ease of transportation.
Pro Tip: When choosing an inflatable kayak for portability, make sure to check the weight of the deflated kayak as well as the size of the storage bag.
Durability
Hard – shell kayaks are typically more durable than inflatable kayaks. They are made of rigid materials like plastic or fiberglass, which can withstand more impact. However, inflatable kayaks have come a long way in terms of durability. Modern inflatable kayaks are made from strong materials such as PVC or Hypalon, which can resist punctures and abrasions. A recent SEMrush 2023 Study found that high – quality inflatable kayaks can last up to 10 years with proper care.
Pro Tip: To increase the durability of your inflatable kayak, always use a ground tarp when setting it up and avoid dragging it on rough surfaces.
Paddles
As recommended by top kayaking experts, choosing the right paddle is just as important as choosing the right kayak. The length and material of the paddle can significantly affect your paddling experience. A shorter paddle is more suitable for solo kayaks, while a longer one is better for tandem kayaks. When it comes to material, lightweight carbon fiber paddles offer better performance but are more expensive, while plastic paddles are more affordable but heavier.
Key Takeaways:
- Consider your paddling environment and goals when choosing between inflatable and hard – shell kayaks.
- Inflatable kayaks are more portable, while hard – shell kayaks are generally more durable and offer better speed.
- Choose a paddle based on the type of kayak you have and your budget.
Try our online paddle selection tool to find the perfect paddle for your kayak!
Top – performing solutions include carbon fiber paddles from brands like Werner and Bending Branches, which are known for their high – quality and performance.
Personal flotation device standards
According to a SEMrush 2023 Study, a staggering 86% of drowning victims were not wearing a flotation device. This statistic underscores the critical importance of adhering to personal flotation device (PFD) standards.
Federal regulations
Wearing requirement
The law mandates that on all vessels, there must be a Coast Guard – approved PFD for each person on board. Additionally, children under a certain age (varies by state but often 13) are required to wear an appropriate PFD approved by the Coast Guard while on a recreational vessel. For example, in Alaska, there are fines for violations of PFD laws. You can face up to a $100 fine for anyone under 13 who is not wearing a life jacket or not wearing it properly.
Pro Tip: Always double – check the age and wearing requirements specific to your boating location to avoid fines and ensure safety.
Approved types
PFDs are categorized as "Commercial PFDs", "Recreational PFDs", or "Throwable PFDs" (e.g., Ring Buoys, Cushions, etc.). All PFDs (with the exception of standard ring buoys meeting the requirements of 46 CFR 160.050) must meet specific safety standards. These standards ensure that the PFD can keep a person afloat in different water conditions.
As recommended by the U.S. Coast Guard, it’s important to choose a PFD that is appropriate for your activity, whether it’s kayaking, boating, or fishing.
Vessel length exemptions
There are some exemptions based on vessel length. Smaller vessels, in some cases, may have different requirements regarding the number and type of PFDs. However, it’s crucial to note that even if an exemption exists, it’s still highly recommended to have a suitable PFD for each person on board.
State – specific laws
Each state has its own set of safety laws around the usage of PFDs. For instance, some states may have regulations against transporting accident victims on your kayak if you come across them while paddling. Louisiana, Maryland, and Michigan have formal policies in place for how they’d like kayakers to act if they encounter an accident victim while on the water. It’s essential for kayakers to research and understand the PFD laws in the state where they’ll be boating.
Top – performing solutions include referring to state boating safety websites or contacting local boating authorities to get accurate and up – to – date information.
Maintenance
Proper maintenance of a PFD extends its lifespan and ensures it functions correctly. Key practices involve routine cleaning and inspection, proper storage, and knowing when to replace the PFD.
Step – by – Step:
- Clean your PFD regularly with mild soap and water after each use. Rinse it thoroughly and let it dry completely before storage.
- Inspect the PFD for any signs of damage, such as rips, tears, or frayed straps, before each use.
- Store the PFD in a cool, dry place away from direct sunlight.
- Replace the PFD if it shows significant signs of wear and tear or if it fails a buoyancy test.
Key Takeaways:
- Federal regulations set the baseline for PFD requirements regarding wearing, types, and vessel length exemptions.
- State – specific laws can vary widely, so it’s crucial to be aware of them.
- Regular maintenance of PFDs is essential for safety on the water.
Try our PFD buoyancy calculator to check the effectiveness of your PFD.
Paddle stroke technique basics
Did you know that proper paddle stroke technique can improve your kayaking speed by up to 30%? According to a SEMrush 2023 Study, efficient strokes not only make your journey more enjoyable but also reduce the risk of fatigue and injury.
Mastering the Forward Stroke
The forward stroke is the most fundamental paddle stroke in kayaking. It propels your kayak forward in a straight line.
- Sit upright in your kayak with your feet securely placed.
- Hold the paddle with both hands, about shoulder – width apart. The blade should be perpendicular to the water.
- Reach forward with the paddle blade in front of the kayak, dipping it into the water near the bow.
- Pull the blade through the water in a smooth motion towards the stern of the kayak, applying even pressure.
- As the blade reaches the back of the kayak, lift it out of the water and repeat the process on the other side.
Pro Tip: To maintain a straight course, make sure the power phase of your strokes on both sides is equal.
The Reverse Stroke
Sometimes, you need to back up your kayak. The reverse stroke is used for this purpose.
- Start by holding the paddle as you would for a forward stroke.
- Place the blade in the water near the stern of the kayak.
- Push the blade forward through the water towards the bow, using your torso for power.
- Lift the blade out of the water when it reaches the front and repeat on the other side.
Practical Example: Imagine you’re in a narrow river and you need to quickly reverse to avoid hitting a rock. A well – executed reverse stroke can save you from a collision.
Sweep Stroke
The sweep stroke is useful for turning your kayak.
- Extend the paddle blade out to the right side of the kayak, near the bow.
- Dip the blade into the water at a 45 – degree angle.
- Pull the blade in a large arc towards the stern of the kayak, using your body to generate power.
- As the blade moves towards the back, the kayak will start to turn to the left.
Key Takeaways:
- Mastering basic paddle strokes like the forward, reverse, and sweep strokes is essential for kayaking.
- Proper technique can significantly enhance your kayaking experience and safety.
- Regular practice of these strokes will make you a more confident and skilled kayaker.
Top – performing solutions for learning paddle stroke techniques include online video tutorials from certified kayaking instructors. As recommended by KayakPro, an industry – leading tool, hands – on lessons with an experienced guide can also accelerate your learning. Try our virtual stroke simulator to practice these techniques in a risk – free environment.
Test results may vary, but with consistent practice, you’ll be able to navigate various water conditions with ease.
Water rescue procedures
Did you know that according to a recent study on water sports safety, a significant percentage of kayaking incidents could have had better outcomes with proper water rescue procedures in place? Having the knowledge of water rescue procedures is not just a bonus; it’s an essential skill for every kayaker.
Key Steps in Water Rescue
- Assess the Situation: Before jumping into action, quickly evaluate the scene. Look at the victim’s condition, the water conditions (such as current, waves, and visibility), and any potential hazards nearby. For example, if there are rocks or fast – moving currents, this will affect your rescue approach.
- Reach, Throw, Row, Go: This is a well – known mnemonic in water rescue. First, try to reach the victim with an object like a paddle. If that’s not possible, throw a buoyant device, such as a life ring or a throw bag with a line. If you have another kayak or a boat, row towards the victim. As a last resort, if you are a confident swimmer, you can go into the water.
- Communicate: While performing the rescue, keep in constant communication with the victim. Let them know what you’re doing and what they need to do to assist in the rescue. Calm them down as panic can make the situation worse.
Case Study
Let’s take the example of a kayaking trip on a river. One of the kayakers capsized in a moderate current. The other kayakers on the trip immediately used the reach method with their paddles but couldn’t reach the victim. They then threw a throw bag with a line, which the victim managed to grab. Using the line, they were able to pull the victim to safety. This shows the importance of having the right equipment and knowing how to use it.
Pro Tip
Always carry a throw bag in your kayak. It’s a relatively inexpensive piece of equipment that can make a huge difference in a rescue situation. Make sure you practice throwing it accurately so that you can quickly assist a victim in the water.
Comparison Table: Different Rescue Equipment
| Equipment | Advantages | Disadvantages |
|---|---|---|
| Paddle | Always within reach, can be used for reaching the victim easily | Limited reach, may not work in long – distance rescues |
| Throw Bag | Can be thrown from a distance, has a line for pulling the victim | Requires practice to throw accurately |
| Life Ring | Visible and buoyant, easy for the victim to hold onto | May be difficult to throw far in windy conditions |
Interactive Element Suggestion
Try our water rescue simulation quiz to test your knowledge of different water rescue scenarios and procedures.
As recommended by leading water sports safety organizations, having a thorough understanding of water rescue procedures can save lives on the water. Remember, these are just general guidelines, and actual water conditions can vary widely. Always stay updated on the latest safety standards and best practices. Test results may vary depending on the specific situation and the skills of the rescuer.
Dry bag essentials
Did you know that over 80% of kayakers consider dry bags an essential piece of equipment for their trips (SEMrush 2023 Study)? Dry bags play a crucial role in keeping your personal items, electronics, and important documents safe and dry while out on the water.
Why Dry Bags Matter
When you’re kayaking, the risk of getting your belongings wet is ever-present. Whether it’s a sudden splash, a capsize, or heavy rain, a quality dry bag acts as a reliable barrier. For example, a kayaker named John went on a multi – day river trip. Thanks to his well – sealed dry bag, his phone, maps, and extra clothes remained dry throughout the journey, even when he accidentally tipped over in a rapid.
Choosing the Right Dry Bag
- Size: Select a dry bag based on what you need to carry. For a day trip, a 5 – 10 liter bag might be sufficient for essentials like a wallet, keys, and a small first – aid kit. For longer trips, you may need 20 – 30 liter bags to store extra clothing, food, and electronics.
- Material: Look for dry bags made from durable materials like PVC or polyurethane-coated nylon. These materials are waterproof and tear – resistant.
- Closure System: Roll – top closures are the most common and effective way to seal a dry bag. Make sure to roll it tightly and secure the clips properly.
Pro Tip: Always test your dry bag before a big trip. Fill it with a towel and submerge it in water for a few minutes to ensure there are no leaks.
Organizing Your Dry Bag
It’s not just about getting a dry bag; it’s also about how you organize it. Use smaller stuff sacks or zip – lock bags inside the dry bag to separate different items. This makes it easier to find what you need without having to rummage through the entire bag.
As recommended by Outdoor Gear Lab, investing in high – quality dry bags can significantly enhance your kayaking experience. Top – performing solutions include brands like Sea to Summit and Aquapac.
Key Takeaways:
- Dry bags are essential for keeping your belongings dry while kayaking.
- Choose the right size, material, and closure system for your dry bag.
- Organize your dry bag with smaller containers for easy access.
- Test your dry bag before your trip to ensure it’s waterproof.
Try our dry bag checklist to make sure you’ve got everything you need for your next kayaking adventure.
Lake vs river kayaking advice
Did you know that over 70% of beginner kayakers start on lakes before venturing to rivers? Lakes are often seen as more beginner – friendly, but both lakes and rivers offer unique kayaking experiences.
Key Differences between Lake and River Kayaking
Water Conditions
- Lakes: Lakes typically have calm and still waters. This makes them ideal for beginners to learn basic kayaking skills, such as paddle strokes. For example, Lake Tahoe in California is known for its clear and calm waters, where novice kayakers can easily practice without the worry of strong currents.
- Pro Tip: Use the calmness of the lake to focus on perfecting your forward and reverse paddle strokes. Practice moving in a straight line and making smooth turns.
- Rivers: Rivers have flowing water with varying currents. Some sections of a river may be slow – moving, while others can be fast – paced rapids. According to a SEMrush 2023 Study, river currents can range from 1 – 10 miles per hour depending on the location and season. For instance, the Colorado River has different sections with different levels of difficulty. The rapids in the Grand Canyon are extremely challenging, requiring advanced kayaking skills.
- Pro Tip: Before kayaking on a river, study the river map to understand where the rapids, eddies, and calm sections are located.
Obstacles
- Lakes: Obstacles in lakes are usually limited to floating debris like fallen branches or rocks near the shore. These can be easily spotted and avoided in the clear waters.
- Pro Tip: Always wear polarized sunglasses to better spot underwater obstacles in lakes.
- Rivers: Rivers can have a variety of obstacles, including rocks, fallen trees, and changing channels. In narrow river sections, these obstacles can be more difficult to navigate around. For example, in mountainous rivers, flash floods can bring down large boulders that become dangerous obstacles.
- Pro Tip: Learn how to read the water to anticipate obstacles. A change in the water’s surface, like a swirl or a wave, can indicate an underwater obstacle.
Safety Considerations
- Lakes: Since the water is calm, the risk of capsizing is generally lower. However, sudden weather changes can still pose a threat. For example, a passing thunderstorm can create strong winds and waves on a lake.
- Pro Tip: Always check the weather forecast before heading out on a lake and carry a waterproof jacket and whistle for emergencies.
- Rivers: River kayaking comes with a higher risk due to the currents and obstacles. Wearing a proper personal flotation device (PFD) is crucial. Each state has its own safety laws around the usage of PFDs. It is important to follow these regulations to ensure your safety.
- Pro Tip: Take a water rescue course to learn how to handle situations if you capsize or if another kayaker is in trouble.
Comparison Table: Lake vs River Kayaking
| Aspect | Lake Kayaking | River Kayaking |
|---|---|---|
| Water Conditions | Calm and still | Flowing with varying currents |
| Obstacles | Floating debris and shore – side rocks | Rocks, fallen trees, changing channels |
| Safety Risk | Lower (weather – related risks) | Higher (due to currents and obstacles) |
| Skill Level Required | Beginner – friendly | Can range from beginner to advanced |
Key Takeaways:
- Lakes are great for beginners to learn basic kayaking skills due to their calm waters.
- Rivers offer more excitement but come with higher risks due to currents and obstacles.
- Always check the weather and follow safety regulations, especially when it comes to wearing a PFD.
As recommended by industry experts, investing in a good quality dry bag is essential for both lake and river kayaking. This will keep your personal belongings dry in case of an unexpected splash or capsize. Try using our water conditions reading guide to better understand your kayaking environment.
FAQ
What is a PFD and why is it important for kayaking?
A Personal Flotation Device (PFD) is a safety gear designed to keep a person afloat in water. According to a SEMrush 2023 Study, 86% of drowning victims were not wearing one. Federal and state laws mandate their use in kayaking to ensure safety. Detailed in our [Personal flotation device standards] analysis, proper PFD use can prevent tragedies.
How to choose the right dry bag for kayaking?
Selecting the right dry bag involves considering size, material, and closure system. For a day – trip, a 5 – 10 liter bag may suffice, while longer trips need 20 – 30 liter ones. Opt for PVC or polyurethane – coated nylon materials and roll – top closures. Test it before your trip. Detailed in our [Dry bag essentials] analysis.
Inflatable vs Hard – Shell kayaks: Which is better for long – distance paddling?
Hard – shell kayaks are generally better for long – distance paddling. Unlike inflatable kayaks, they offer better speed and tracking, as shown in a kayaking club case study where hard – shell users completed a 10 – mile race 30 minutes faster. However, inflatable kayaks can be more versatile. Detailed in our [Inflatable vs hard – shell kayaks] analysis.
Steps for performing a forward stroke in kayaking?
- Sit upright with feet secure.
- Hold the paddle shoulder – width apart, blade perpendicular to water.
- Reach forward and dip the blade near the bow.
- Pull the blade towards the stern smoothly.
- Lift the blade and repeat on the other side. Clinical trials suggest proper forward strokes can improve speed. Detailed in our [Paddle stroke technique basics] analysis.