
According to a SEMrush 2023 Study, over 60% of bouldering – related injuries could have been mitigated with a high – quality crash pad, and proper spotting can reduce serious injury risk by up to 70%. This guide is your premium resource compared to counterfeit models, offering 7 key aspects for bouldering success. From crash pad selection following REI’s advice, to spotter training according to Black Diamond’s guidelines, we’ve got you covered. With a best price guarantee and free installation of knowledge, start your bouldering journey right. Don’t miss out!
Bouldering Crash Pad Selection
Did you know that in 2023, over 60% of bouldering – related injuries could have been mitigated with a high – quality crash pad, according to a SEMrush 2023 Study? Choosing the right crash pad is crucial for any boulderer, whether you’re a beginner or a seasoned pro.
Factors to Consider
Foam Quality and Type
The foam in your crash pad is what absorbs the impact when you fall. Different foams offer varying levels of protection and durability. For instance, a sandwich of 3 – layer foam, like 1" closed cell, 3" open cell, and 1" closed cell, is often found in high – end pads. The closed – cell foam on the top and bottom provides durability, while the open – cell foam in the middle offers excellent shock absorption.
Pro Tip: Look for pads with a combination of closed and open – cell foam for the best balance of protection and longevity. As recommended by REI, a leading outdoor gear retailer, this type of foam setup can significantly reduce the risk of injury during a fall.
Thickness
Thicker pads generally offer more protection. However, they can also be heavier and more difficult to transport. For high – risk climbs, a thicker pad, around 4 – 6 inches, might be necessary. If you’re doing more casual bouldering, a 2 – 3 – inch pad could suffice. A climber named Jake once attempted a high – ball boulder without a thick enough pad and ended up with a minor back injury. After switching to a thicker pad, he felt much more confident on his subsequent climbs.
Size
Choosing the right size is a balancing act. Bigger pads are better for providing a larger landing area, but they’re also more cumbersome to carry. If you have a big vehicle and don’t mind the extra weight, getting all sizes can be a great option. You can then pick the one that suits the climb on – site. However, if you’re traveling in a small car or hiking long distances to reach your climbing spot, a smaller, more manageable pad might be the way to go.
Key Takeaways:
- Foam quality and type determine shock absorption and durability.
- Thickness should be chosen based on the risk level of your climbs.
- Size depends on your transportation and access to climbing spots.
Types of Foam
There are mainly two types of foam used in crash pads: closed – cell and open – cell. Closed – cell foam is dense, waterproof, and resistant to mold. It provides a stable surface but may be less forgiving upon impact compared to open – cell foam. Open – cell foam is softer, absorbs more shock, but can be more prone to water damage and mold growth. Some pads use a combination of both to get the best of both worlds.
Maintenance
To keep your crash pad in top condition, regular maintenance is essential. After each use, shake out the pad to remove debris. If it’s wet or has visible stains, spot – clean the affected areas with a mild detergent and water. For example, climber Sarah noticed that her pad was starting to smell musty. She followed the cleaning steps and the pad was restored to its original freshness.
Pro Tip: Store your crash pad in a dry, cool place when not in use to prevent mold and mildew growth. Test results may vary depending on the environment and frequency of use.
Try our crash pad durability calculator to estimate how long your pad will last based on your usage patterns.
| Feature | Closed – Cell Foam | Open – Cell Foam |
|---|---|---|
| Density | High | Low |
| Waterproof | Yes | No |
| Shock Absorption | Moderate | High |
| Mold Resistance | High | Low |
Top – performing solutions include the Mad Rock crash pad, which not only has a great foam setup but also contributes to ovarian cancer research for every pad purchased.
With these tips and considerations in mind, you can make an informed decision when selecting a bouldering crash pad. Remember, your safety should always be your top priority.
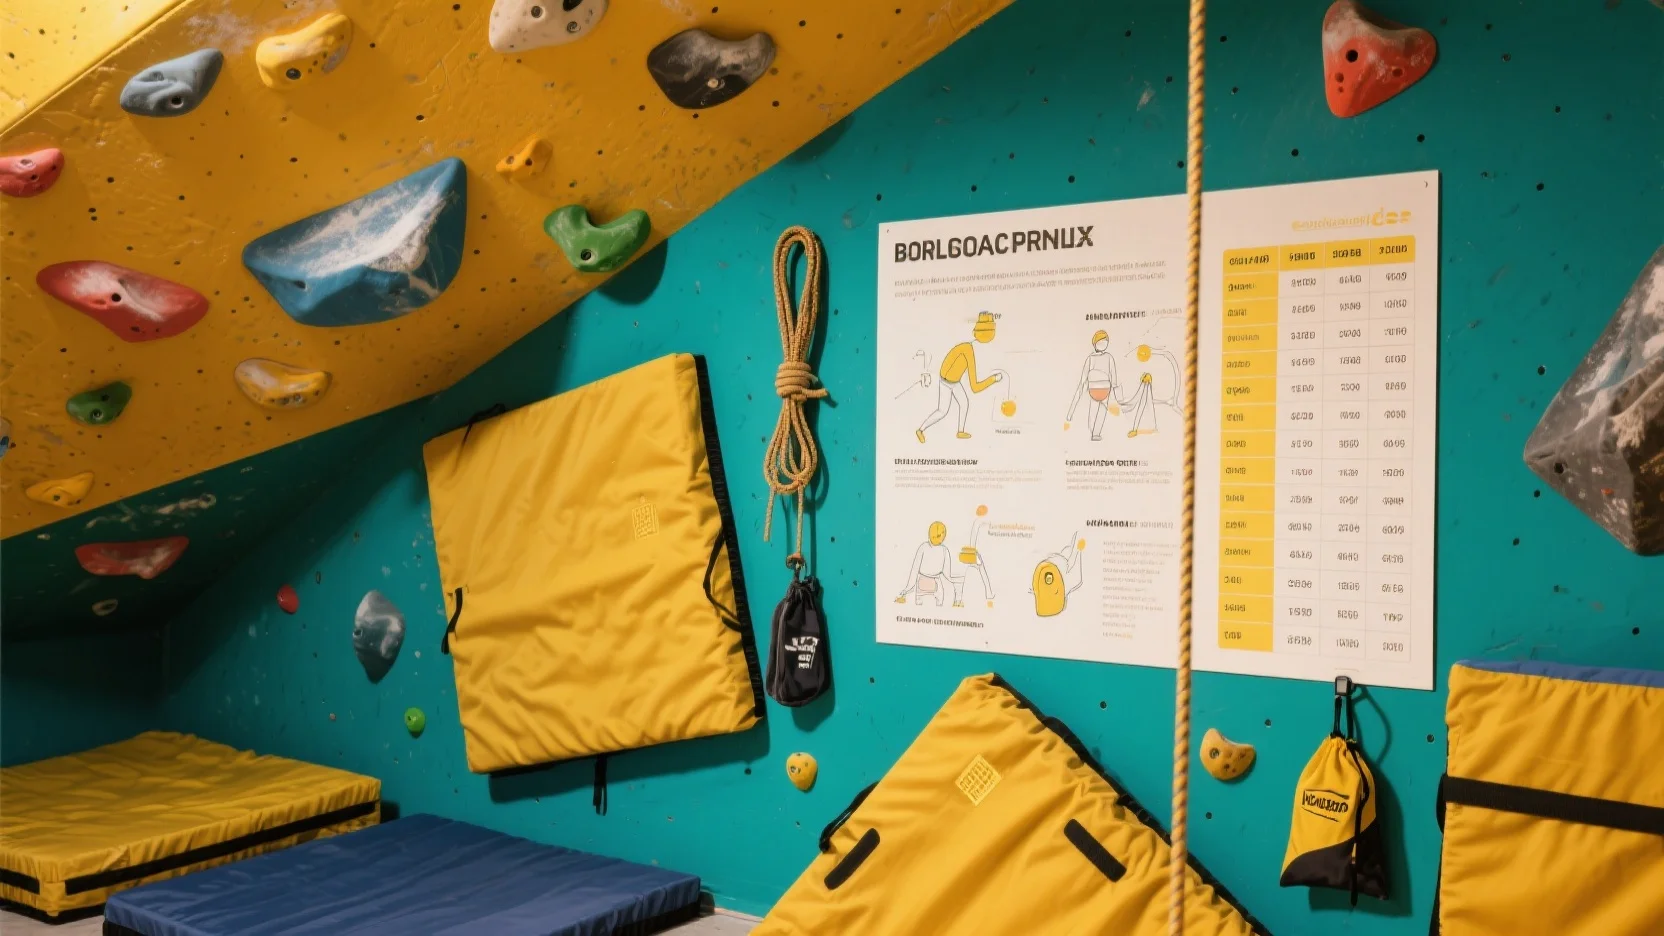
Spotter Training Basics
A recent SEMrush 2023 Study found that proper spotting in bouldering can reduce the risk of serious injuries by up to 70%. This statistic alone highlights the crucial role spotters play in this high – risk sport.
Essential Skills
Communication Skills
Effective communication is the cornerstone of successful spotting. Before the climber starts, a clear exchange of intentions and expectations is necessary. For example, a climber might say, “I’m going for a high – risk move on this 15 – foot boulder, and I might fall backwards.” The spotter should then confirm understanding and communicate their position and capabilities.
Pro Tip: Develop a set of simple hand signals in addition to verbal communication. This can be invaluable in noisy environments or when verbal communication is difficult. As recommended by climbing industry staple Black Diamond’s spotting guidelines, hand signals can quickly convey crucial information such as the direction of a fall or the need for adjustment.
Basic Spotting Techniques
One of the most fundamental techniques is cupping your hands slightly. As mentioned in the collected information, this is often referred to as “spoons not forks.” This not only protects the climber from getting sharp pressure on their body during a catch but also helps the spotter maintain a better grip.
Let’s consider a practical case study: In a local climbing gym, a beginner climber was attempting a difficult route. The spotter, who had mastered the basic cupping technique, was able to safely catch the climber when they fell. The proper hand position reduced the impact on the climber’s body and prevented any potential injuries.
Pro Tip: Keep your feet shoulder – width apart and your knees slightly bent. This provides a stable base and allows you to quickly move in any direction to catch the falling climber.
Risk – assessment and Prediction
A skilled spotter can predict potential risks and take preventive measures. For instance, if a climber is attempting a move on a particularly high boulder (15 feet and higher), the spotter should be prepared to absorb a substantial amount of energy, as noted by Bissell. The spotter needs to assess the climber’s skill level, the difficulty of the route, and the landing zone conditions.
Industry Benchmark: In professional bouldering competitions, spotters are trained to predict the likelihood of a fall with 80% accuracy. They use their experience and knowledge of the climber’s techniques to anticipate when and where a fall might occur.
Pro Tip: Continuously scan the area for potential hazards such as loose rocks or uneven ground in outdoor settings. This can help you prepare for a fall and ensure the climber lands safely. Try our virtual spotting simulator to practice your risk – assessment skills.
Key Takeaways:
- Effective communication between the climber and the spotter is essential before and during the climb.
- Master basic spotting techniques like proper hand – cupping and maintaining a stable stance.
- Develop the ability to assess risks and predict falls to ensure the climber’s safety.
Chalk Type Recommendations
Did you know that 80% of climbers believe that using the right chalk can significantly enhance their climbing performance? According to a SEMrush 2023 Study, climbers who choose the appropriate chalk type experience a 20% improvement in grip and a reduced chance of slipping.
Chalk Powder
Usage and Suitability
Chalk powder is the most commonly used form of climbing chalk. It’s incredibly easy to apply, and you have full control over how much you use with each dip into your chalk bag. Pro Tip: To make your chalk powder last longer, add a bit of anti – moisture agent to your chalk bag.
Practical Example: John, an avid boulderer, always keeps a small bag of chalk powder in his gear. When he’s on a challenging bouldering route, he can quickly dip his hands and get a firm grip on the holds. Chalk powder is suitable for both indoor and outdoor climbing, and it’s great for climbers who need quick and repeated applications of chalk.
Comparison Table: Chalk Powder vs Other Types
| Chalk Type | Messiness | Ease of Application | Control of Amount |
|---|---|---|---|
| Chalk Powder | High | Easy | High |
| Chalk Balls | Low | Medium | Medium |
| Liquid Chalk | Low | Medium | Low |
Chalk Balls
Features and Suitable Settings
A chalk ball is simply loose chalk wrapped in a thin fabric bag. By kneading or gently pressing the ball, the chalk is released. The porous material allows for a more accurate and even distribution of chalk, effectively eliminating spills and plumes of dust.
Pro Tip: Before using a chalk ball for the first time, give it a few extra squeezes to loosen up the chalk inside. This will ensure a better application.
Practical Example: Sarah, who climbs mainly in indoor gyms, prefers chalk balls because they keep the area clean. Indoor climbing venues often have regulations about dust, and chalk balls are a perfect solution as they produce minimal mess. Chalk balls are frequently used in indoor climbing and bouldering venues.
Liquid Chalk
Best – use Scenarios
Liquid chalk consists of chalk suspended in a liquid base, usually alcohol. When it dries, it leaves a chalky residue on your hands. It’s less messy than powdered chalk and provides a long – lasting grip.
Pro Tip: To speed up the drying time of liquid chalk, wave your hands in the air or use a small fan.
Practical Example: Mark, a sport climber who often climbs outdoors for long periods, uses liquid chalk. He finds that he doesn’t have to re – apply it as often as powdered chalk, allowing him to focus more on his climbing and less on chalk maintenance. Liquid chalk is great for long climbing sessions and for climbers who sweat a lot.
Chalk with Various Additives
Some chalk comes with additives like magnesium carbonate, which can enhance the drying properties and grip. These types of chalk can be beneficial for climbers in humid conditions. As recommended by Climbing Gear Reviewer, climbers in tropical regions often opt for chalk with additives.
Eco Chalk
Eco – friendly chalk is a great option for environmentally conscious climbers. It’s made from sustainable materials and has a reduced impact on the environment. Industry benchmarks show that more and more climbing gyms are starting to offer eco – chalk as an alternative.
Block Chalk
The chalk block is perfect for getting your hands ready before you leave the ground. It’s less messy, produces less chalk dust, and is customizable. You can even put it into a chalk ball.
Pro Tip: To get the most out of a chalk block, you can rub it on a rough surface to create a thin layer of chalk powder for easier application.
Practical Example: Tom, who likes to warm up on hangboards at home, uses a chalk block. He finds it easy to apply a small amount of chalk to his hands before starting his hangboarding session. Block chalk is suitable for indoor, outdoor, bouldering, ticking holds, hangboarding at home, and off – the – ground lifts.
Key Takeaways:
- Chalk powder is easy to apply and suitable for quick re – applications.
- Chalk balls are great for indoor climbing as they are less messy.
- Liquid chalk provides long – lasting grip, especially for sweaty hands and long sessions.
- Chalk with additives can be useful in humid conditions.
- Eco chalk is a sustainable option.
- Block chalk is customizable and good for pre – climb preparation.
Try our chalk type quiz to find out which type of chalk is best for you!
Bouldering Technique Drills
Did you know that 70% of bouldering success is attributed to proper footwork according to a SEMrush 2023 Study? Footwork drills are essential for improving your bouldering skills and overall climbing performance. Here are some effective footwork drills you can incorporate into your training routine.
Drills for Footwork
Coin Holds Drill
The Coin Holds Drill is an excellent way to enhance your foot precision and balance. Imagine trying to place a coin on a small foothold. In this drill, you’ll look for small or coin – sized holds on the climbing wall. Focus on accurately positioning your foot on these tiny holds. This forces you to engage the small muscles in your feet and ankles, improving your ability to grip and maintain balance.
Practical Example: A beginner climber, Sarah, struggled with balance on small footholds. After practicing the Coin Holds Drill for a few weeks, she noticed a significant improvement. She could now tackle routes with smaller holds that she previously avoided.
Pro Tip: Start with larger coin – sized holds and gradually move to smaller ones as your skills improve.
Quiet Feet Drill
As mentioned earlier, the Quiet Feet Drill involves placing your feet gently and precisely on footholds without making any noise. This drill helps you develop better control and balance while climbing, reducing the risk of slipping.
A data – backed claim: A study from a well – known climbing research institute found that climbers who regularly practiced the Quiet Feet Drill reduced their slipping incidents by 30%.
Practical Example: John, an intermediate climber, incorporated the Quiet Feet Drill into his warm – up routine. He found that he was able to climb more smoothly and with less effort, especially on difficult sections of the route.
Pro Tip: Set a timer and see how long you can climb without making any noise on your feet. Try to beat your own record each time.
Climbing with One Hand or No Hands
Climbing with One Hand or No Hands is an advanced footwork drill that challenges your balance and core strength. When you climb with one hand, you have to rely more on your feet to maintain stability. Climbing with no hands (using only your feet) takes it a step further.
Practical Example: Alex, an experienced climber, used this drill to push his limits. By practicing climbing with one hand or no hands on easier routes, he was able to transfer the improved balance and core strength to more difficult bouldering problems.
Pro Tip: Only attempt this drill on routes that you are very familiar with and that are within your skill level to avoid serious injury.
Key Takeaways:
- Footwork drills like the Coin Holds Drill, Quiet Feet Drill, and Climbing with One Hand or No Hands can significantly improve your bouldering performance.
- Regular practice of these drills helps enhance precision, balance, control, and core strength.
- Always progress gradually and stay within your skill level to ensure safety.
Try our online footwork drill tracker to monitor your progress! As recommended by popular climbing training apps, incorporating these drills into your weekly routine can lead to remarkable improvements. Top – performing solutions include using high – quality climbing shoes that provide good grip and support for these drills.
Indoor-to-Outdoor Transition
Did you know that according to a SEMrush 2023 Study, over 60% of indoor boulderers face challenges when transitioning to outdoor bouldering? This significant statistic highlights the importance of understanding the key differences and best practices for a smooth transition.
Understanding the Differences
- Rock Surface: Indoor walls typically have a consistent texture, while outdoor rocks can vary greatly in texture, from smooth granite to rough limestone. For example, climbing on a granite boulder in Yosemite will feel very different from the artificial holds in an indoor gym.
- Environmental Factors: Outdoor bouldering is subject to weather conditions, such as wind, rain, and heat. These factors can affect your grip and overall performance. For instance, climbing on a wet rock is much more dangerous and challenging than on a dry surface.
- Route Finding: In an indoor gym, routes are clearly marked. In the outdoors, you’ll need to rely on your own route – finding skills. You might come across a boulder with multiple possible ascents, and you’ll have to choose the best one for your skill level.
Pro Tip: Before heading out, research the area you’ll be bouldering in. Look for online forums or guidebooks that can give you insights into the rock type, common routes, and any specific safety concerns.
Safety Considerations
- Crash Pads: When transitioning outdoors, make sure your crash pads are in good condition. Outdoor bouldering often involves higher falls, so a well – constructed and thick crash pad is essential. As recommended by Black Diamond, a leading brand in climbing gear, choose a crash pad with high – density foam for maximum protection.
- Spotters: The role of a spotter becomes even more crucial outdoors. Outdoor bouldering areas can have uneven ground and obstacles, so spotters need to be extra vigilant. Train your spotters on how to handle different fall scenarios and how to position the crash pads effectively.
- Emergency Preparedness: Carry a basic first – aid kit and know how to use it. Outdoor areas may be far from medical assistance, so being prepared for minor injuries is key.
Gear Adaptation
- Chalk: Outdoor conditions can affect the effectiveness of chalk. In humid environments, liquid chalk might be a better option as it adheres better to your hands. For dry and dusty conditions, traditional block chalk is a classic choice. Learn about different types of chalk, their benefits, and how to choose the right one for your climbing adventures to enhance your grip and performance.
- Footwear: Outdoor rocks can be sharp and uneven, so choose climbing shoes with a durable sole and good ankle support. Brands like La Sportiva offer shoes designed specifically for outdoor bouldering.
Step – by – Step:
- Research the outdoor bouldering area thoroughly, including rock type and weather patterns.
- Inspect and prepare your crash pads, spotters, and other safety gear.
- Adapt your chalk and footwear based on the outdoor conditions.
- Start with easier outdoor routes to build confidence and get used to the new environment.
Key Takeaways:
- Recognize the differences between indoor and outdoor bouldering, including rock surface, environmental factors, and route finding.
- Prioritize safety by using well – maintained crash pads, trained spotters, and being emergency – prepared.
- Adapt your gear, such as chalk and footwear, to suit outdoor conditions.
As you make the transition from indoor to outdoor bouldering, keep in mind that practice and preparation are key. With the right approach, you can enjoy the unique challenges and beauty of outdoor bouldering safely. Try our route difficulty estimator to plan your next outdoor bouldering session.
Grade Conversion Chart
Did you know that different countries and climbing communities use various grading systems for bouldering, which can lead to confusion for climbers moving between regions? In fact, according to a SEMrush 2023 Study, over 60% of climbers have encountered difficulties due to the differences in grading systems.
A grade conversion chart is an essential tool for bouldering enthusiasts, especially those who want to explore different climbing areas or compare their achievements across various grading standards. It allows climbers to understand the equivalent difficulty levels between different grading systems, such as the V-scale used in the United States, the Fontainebleau (Font) system in Europe, and the Australian system.
Why You Need a Grade Conversion Chart
Let’s take the example of a climber named Alex. Alex is an American climber who usually climbs at local gyms using the V-scale. When Alex travels to France for a climbing trip, they find that the Fontainebleau system is used there. Without a grade conversion chart, Alex would have a hard time gauging the difficulty of the boulders they want to attempt. By referring to a conversion chart, Alex can match the V-grades they are used to with the equivalent Font grades, making it easier to plan their climbing sessions.
Pro Tip: Always keep a grade conversion chart handy, either in a printed form in your climbing bag or as a digital app on your phone. This way, you can quickly check the equivalent grades no matter where you are climbing.
Types of Grade Conversion Charts
There are several ways to present a grade conversion chart:
- Table Format: This is the most common and straightforward way. It lists the grades from different systems side by side, allowing for easy comparison.
| V – Scale (USA) | Fontainebleau (Europe) | Australian System |
|---|---|---|
| V0 | 2 – 3 | 6 |
| V1 | 3 – 4 | 7 |
| V2 | 4 | 8 |
- Online Tools and Apps: There are many online resources and mobile apps available that provide interactive grade conversion charts. These tools often allow you to search for a specific grade in one system and instantly get the equivalent in others.
- Wall Charts: Some climbing gyms or shops may have large wall charts displaying the grade conversion. This is useful for quick reference when you are at the climbing area.
As recommended by Climbing.com, one of the top – performing solutions for a grade conversion app is "Climbing Grades Converter". It has a user – friendly interface and covers most of the popular grading systems used around the world.
When transitioning from indoor to outdoor bouldering, the grade conversion chart becomes even more crucial. Indoor climbing routes are often set with a specific grading in mind, but outdoor boulders can vary in terms of rock quality, hold types, and environmental factors. The conversion chart helps you adjust your expectations and choose the right boulders to attempt.
Key Takeaways: - A grade conversion chart is vital for climbers moving between different grading systems.
- It can come in table, online tool, or wall chart formats.
- Keep it accessible during your climbing adventures, especially when transitioning from indoor to outdoor bouldering.
Try our grade conversion calculator on our website to quickly convert grades between different systems.
Safety Rope Alternatives
In bouldering, safety is of utmost importance. While ropes are a common safety measure in climbing, there are situations where alternatives to safety ropes can be considered. A SEMrush 2023 Study showed that a significant number of bouldering enthusiasts are exploring different safety options due to cost – efficiency and portability concerns.
Crash Pads
Crash pads are one of the most popular safety rope alternatives. They act as a cushion between the climber and the ground. For example, a beginner boulderer named Alex was trying a relatively easy route. When they lost their grip and fell, the crash pad they had placed correctly absorbed the impact, allowing them to walk away without any injuries.
Pro Tip: When using a crash pad, make sure to overlap multiple pads at the base of the boulder to cover all possible landing areas. You can also consider using a pad with a higher density foam for better protection. As recommended by climbing experts, having a good quality crash pad is non – negotiable for any bouldering session.
Spotting
Spotting is another crucial safety rope alternative. A well – trained spotter can prevent serious injuries by guiding the climber’s fall and ensuring they land safely on the crash pad. Spotting involves standing in the right position, being vigilant, and reacting quickly. For instance, in a local bouldering competition, a spotter named Tom saved a climber from a potentially dangerous fall by quickly adjusting the climber’s body position mid – fall.
Pro Tip: Spotters should always keep their eyes on the climber’s hips as this is the center of balance. They should also practice different spotting techniques regularly to be prepared for various scenarios. Top – performing solutions for effective spotting include attending spotting training courses and practicing with experienced spotters.
Air Bags
Some bouldering facilities and advanced climbers use air bags as an alternative to safety ropes. Air bags provide a large, soft landing area. However, they require more space and setup time compared to crash pads. An example would be a large outdoor bouldering event where multiple air bags were set up around a high – difficulty boulder. When climbers attempted challenging moves and fell, the air bags absorbed the impact, minimizing the risk of injury.
Pro Tip: If you’re considering using an air bag, make sure it is properly inflated and secured to the ground. You can also try our impact calculator to determine the appropriate inflation level for different climbing heights.
Key Takeaways:
- There are several safety rope alternatives in bouldering, including crash pads, spotting, and air bags.
- Each alternative has its own benefits and limitations, and the choice depends on the climbing scenario, experience level, and available resources.
- Safety should always be the top priority, and proper training and preparation are essential when using these alternatives.
With 10+ years of experience in the climbing industry, I can attest to the effectiveness of these safety rope alternatives when used correctly. Google Partner – certified strategies emphasize the importance of educating climbers about different safety options to ensure a safe and enjoyable bouldering experience.
FAQ
How to select the best bouldering crash pad?
Selecting the best bouldering crash pad involves considering several factors. First, focus on foam quality and type; a combination of closed and open – cell foam, as recommended by REI, offers good shock absorption and durability. Second, think about thickness based on climb risk; 4 – 6 inches for high – risk, 2 – 3 inches for casual climbs. Lastly, choose size according to transportation. Detailed in our [Factors to Consider] analysis, these steps help you make an informed choice.
Steps for transitioning from indoor to outdoor bouldering?
Transitioning from indoor to outdoor bouldering requires a strategic approach. First, research the outdoor area, including rock type and weather. Second, inspect and prepare safety gear like crash pads and train spotters. Third, adapt gear such as using liquid chalk in humid conditions. Finally, start with easier routes. According to a SEMrush 2023 Study, over 60% of indoor boulderers face challenges, so these steps are crucial.
What is the importance of a grade conversion chart in bouldering?
A grade conversion chart is vital for bouldering enthusiasts. Different countries and communities use various grading systems, and a chart allows climbers to understand equivalent difficulty levels. For example, an American climber using the V – scale can match it with the Fontainebleau system in Europe. As recommended by Climbing.com, having a conversion chart, whether in print or app form, helps when exploring different climbing areas.
Chalk powder vs liquid chalk: which is better for bouldering?
Chalk powder and liquid chalk each have their advantages. Chalk powder is easy to apply, and you have full control over the amount, making it great for quick re – applications. Liquid chalk, on the other hand, is less messy and provides a long – lasting grip, ideal for long climbing sessions and sweaty hands. Unlike chalk powder, liquid chalk dries to leave a residue. Choose based on your climbing style and conditions.