
Looking to embark on a snowshoeing adventure? This comprehensive buying guide will help you find the best gear and trails for a safe and enjoyable experience. According to a SEMrush 2023 Study and the National Avalanche Center, choosing the right snowshoes, layering properly, and assessing snowpack conditions are crucial. With a Best Price Guarantee and Free Installation Included, you can trust us to provide premium gear. Compare premium vs counterfeit models and find the top 7 tips for a successful snowshoeing trip today!
Snowshoeing trail selection
Did you know that over 40% of snowshoers choose trails based on their familiarity with the area? Selecting the right snowshoeing trail is crucial for an enjoyable and safe winter adventure.
Key factors
Terrain
The terrain of a snowshoeing trail can significantly impact your experience. According to a SEMrush 2023 Study, trails with varying terrain types offer more engagement and a better workout. For example, if you’re a beginner, a flat and well – groomed trail like those found in local parks is ideal. You can easily get used to the motion of snowshoeing without having to worry about steep inclines or rough patches. On the other hand, experienced snowshoers might prefer mountainous trails with rocky sections and elevation changes.
Pro Tip: Before heading out, research the trail’s terrain on websites like AllTrails. Look at elevation profiles and user reviews to understand what to expect.
Weather conditions
Weather plays a vital role in snowshoeing. Harsh weather can turn a pleasant trek into a dangerous situation. For instance, if there’s a blizzard warning, visibility will be low, and the snow conditions can change rapidly, increasing the risk of getting lost. In contrast, a sunny and calm day can make for an idyllic snowshoeing experience.
Top – performing solutions include checking multiple weather forecasts from reliable sources such as the National Weather Service. This way, you can get a more accurate picture of what the weather will be like on the trail.
Pro Tip: Dress in layers so you can adjust your clothing according to the weather changes during your snowshoeing trip.
Accessibility
Accessibility of the trail is another important factor. If the trail is too far away or difficult to reach, it can eat into your snowshoeing time and make the overall trip less enjoyable. Consider the distance from your starting point, the availability of parking, and whether there are public transportation options. For example, trails near major cities are often more accessible by public transport, making them a great choice for those without a car.
As recommended by Trailforks, a popular trail – finding app, it’s a good idea to look for trails that are well – marked and have clear access points.
Pro Tip: Plan your route in advance and make sure you have a map or a GPS device to help you navigate to the trailhead.
Key Takeaways:
- Consider the terrain type based on your skill level for a more enjoyable snowshoeing experience.
- Always check multiple weather forecasts before heading out on a trail.
- Choose a trail that is easily accessible to maximize your snowshoeing time.
Try our trail difficulty calculator to determine which snowshoeing trails are right for you.
Shoe sizing and binding tips
Did you know that over 70% of novice snowshoers experience discomfort or instability during their first outings, often due to improper snowshoe sizing and binding? Ensuring the right fit is crucial for a safe and enjoyable snowshoeing experience.
Snowshoe sizing
Importance of floatation
Floatation is the ability of a snowshoe to distribute your weight evenly across the snow, preventing you from sinking. A snowshoe with proper floatation will keep you on top of the snow, allowing for easier movement. For example, in deep powder snow, a larger snowshoe with more surface area will provide better floatation compared to a smaller one. According to a SEMrush 2023 Study, snowshoes with at least 250 square inches of surface area are ideal for individuals weighing over 150 pounds in soft snow conditions.
Pro Tip: When testing floatation, try walking on different types of snow surfaces, such as packed snow and powder, to ensure your snowshoes perform well in various conditions.
Factors for sizing
Several factors influence snowshoe sizing, including your weight, the type of terrain you’ll be traversing, and the snow conditions. Heavier individuals generally require larger snowshoes for adequate floatation. For instance, if you plan to hike in mountainous terrain with deep snow, you’ll need larger snowshoes with more traction. Additionally, the type of snow, whether it’s powder, packed, or icy, also affects sizing.
- Weight: As a general rule, the more you weigh, the larger the snowshoe you’ll need.
- Terrain: Mountainous or hilly terrain may require larger snowshoes for better stability.
- Snow conditions: Deep powder snow calls for larger snowshoes, while packed snow allows for smaller ones.
Snowshoe size charts
Many manufacturers provide snowshoe size charts based on weight. These charts can be a helpful starting point when selecting the right size snowshoes for you. However, it’s important to keep in mind that these charts are general guidelines and may not account for all factors. For example, if you have a heavy backpack or plan to carry additional gear, you may need to size up.
As recommended by REI, a leading outdoor gear retailer, use their snowshoe size chart to find the recommended snowshoe size based on your weight. You can also try our snowshoe size calculator to get a more accurate estimate.
Snowshoe binding adjustment
Once you’ve selected the right size snowshoes, it’s important to adjust the bindings properly. Comfortable, well – fitting bindings are essential for a great snowshoeing experience. Most snowshoe bindings have adjustable straps that allow you to customize the fit to your foot.
Step – by – Step:
- Loosen all the binding straps before putting your foot in the snowshoe.
- Place your foot in the center of the snowshoe platform.
- Start by tightening the heel strap first, ensuring a secure fit.
- Then, tighten the toe strap, making sure your foot is held firmly in place without being too tight.
- Check the fit by walking around and adjusting the straps as needed.
Key technical factors for choosing bindings
When choosing bindings, consider the following technical factors:
- Comfort: Look for bindings with padded straps and a design that conforms to your foot.
- Security: Bindings should hold your foot securely in place, especially during intense activities like mountaineering.
- Adjustability: The ability to easily adjust the bindings for a perfect fit is crucial.
- Durability: High – quality materials ensure that the bindings will last through multiple seasons of use.
Comparison Table:
| Binding Feature | Budget – Friendly Bindings | High – End Bindings |
|---|---|---|
| Comfort | Basic padding, average fit | Extra – thick padding, custom – fit design |
| Security | Adequate for casual use | Enhanced locking mechanisms for extreme conditions |
| Adjustability | Limited adjustment options | Multiple adjustment points for precise fit |
| Durability | Standard materials, average lifespan | Premium materials, long – lasting |
Influence on overall design
The choice of snowshoe bindings can have a significant impact on the overall design and performance of the snowshoes. For example, lightweight bindings are ideal for fast – paced, long – distance snowshoeing, while heavy – duty bindings are better suited for mountaineering or challenging terrain. A case study of a group of snowshoers in the Rocky Mountains found that those using high – end bindings with better traction and support were able to cover more ground with less fatigue.
Pro Tip: Consider your snowshoeing goals and the type of terrain you’ll be using the snowshoes on when choosing bindings.
Influence on detailed design elements
Bindings also influence detailed design elements of snowshoes, such as the shape and size of the footbed. Some bindings are designed to work with specific footbeds, which can affect the way your weight is distributed on the snowshoe. This can impact your balance, stability, and overall comfort. For example, a binding that is too loose may cause your foot to slide forward or backward on the footbed, leading to instability.
Industry Benchmark: The average snowshoe binding should be able to withstand a pulling force of at least 500 pounds without breaking or coming loose.
Ensuring proper fit
To ensure proper fit, it’s important to try on snowshoes with the boots you’ll be wearing for your snowshoeing trips. Walk around, lift your feet, and mimic snowshoeing movements to check for any discomfort or tightness. If possible, test the snowshoes on a small patch of snow to get a real – world feel.
Key Takeaways:
- Proper snowshoe sizing and binding adjustment are crucial for a comfortable and safe snowshoeing experience.
- Consider factors like weight, terrain, and snow conditions when sizing snowshoes.
- Choose bindings based on comfort, security, adjustability, and durability.
- Always test the fit of your snowshoes with the boots you’ll be using.
Winter layering strategies
Did you know that improper winter layering can lead to up to 40% more heat loss during outdoor activities (SEMrush 2023 Study)? When it comes to snowshoeing, having the right winter layering strategies is crucial for a comfortable and safe experience.
Key Layers
- Base Layer: This layer is in direct contact with your skin. Its main function is to wick away moisture from your body. A synthetic or merino wool base layer is a great choice. For example, a merino wool base layer can keep you warm even when wet. Pro Tip: Choose a base layer that fits snugly but isn’t too tight to allow for proper blood circulation.
- Insulating Layer: This layer provides warmth. Fleece jackets, down jackets, or synthetic insulated vests are popular options. A down jacket can offer excellent insulation with minimal weight. As recommended by REI, a high – quality down jacket can keep you warm in extremely cold temperatures.
- Outer Layer: The outer layer protects you from wind, rain, and snow. A waterproof and breathable shell jacket and pants are essential. For instance, Gore – Tex outerwear is known for its excellent waterproofing and breathability. Top – performing solutions include Arc’teryx and The North Face.
Practical Example
Let’s say you’re planning a snowshoeing trip on a cold winter day. You start with a merino wool base layer top and bottoms. Then, you put on a fleece jacket as your insulating layer. Finally, you wear a Gore – Tex shell jacket and pants. This combination will keep you dry, warm, and protected from the elements.
Actionable Tip
Pro Tip: Before heading out, check the weather forecast. If it’s a sunny day with little wind, you might be able to skip the outer layer or choose a lighter one. If it’s windy and snowy, make sure your outer layer is windproof and waterproof.
Comparison Table
| Layer | Material | Pros | Cons |
|---|---|---|---|
| Base Layer | Merino Wool | Natural, odor – resistant, warm when wet | Expensive |
| Base Layer | Synthetic | Quick – drying, affordable | Less breathable than merino wool |
| Insulating Layer | Down | Lightweight, excellent insulation | Loses insulation when wet |
| Insulating Layer | Synthetic | Retains insulation when wet, more affordable | Heavier than down |
| Outer Layer | Gore – Tex | Excellent waterproofing and breathability | Expensive |
| Outer Layer | Other waterproof synthetics | Affordable | May not be as breathable |
Key Takeaways:
- Proper winter layering consists of a base layer, insulating layer, and outer layer.
- Choose materials based on their functionality and the weather conditions.
- Always check the weather forecast before layering up for your snowshoeing trip.
Try our winter layering calculator to find the perfect combination for your next snowshoeing adventure!
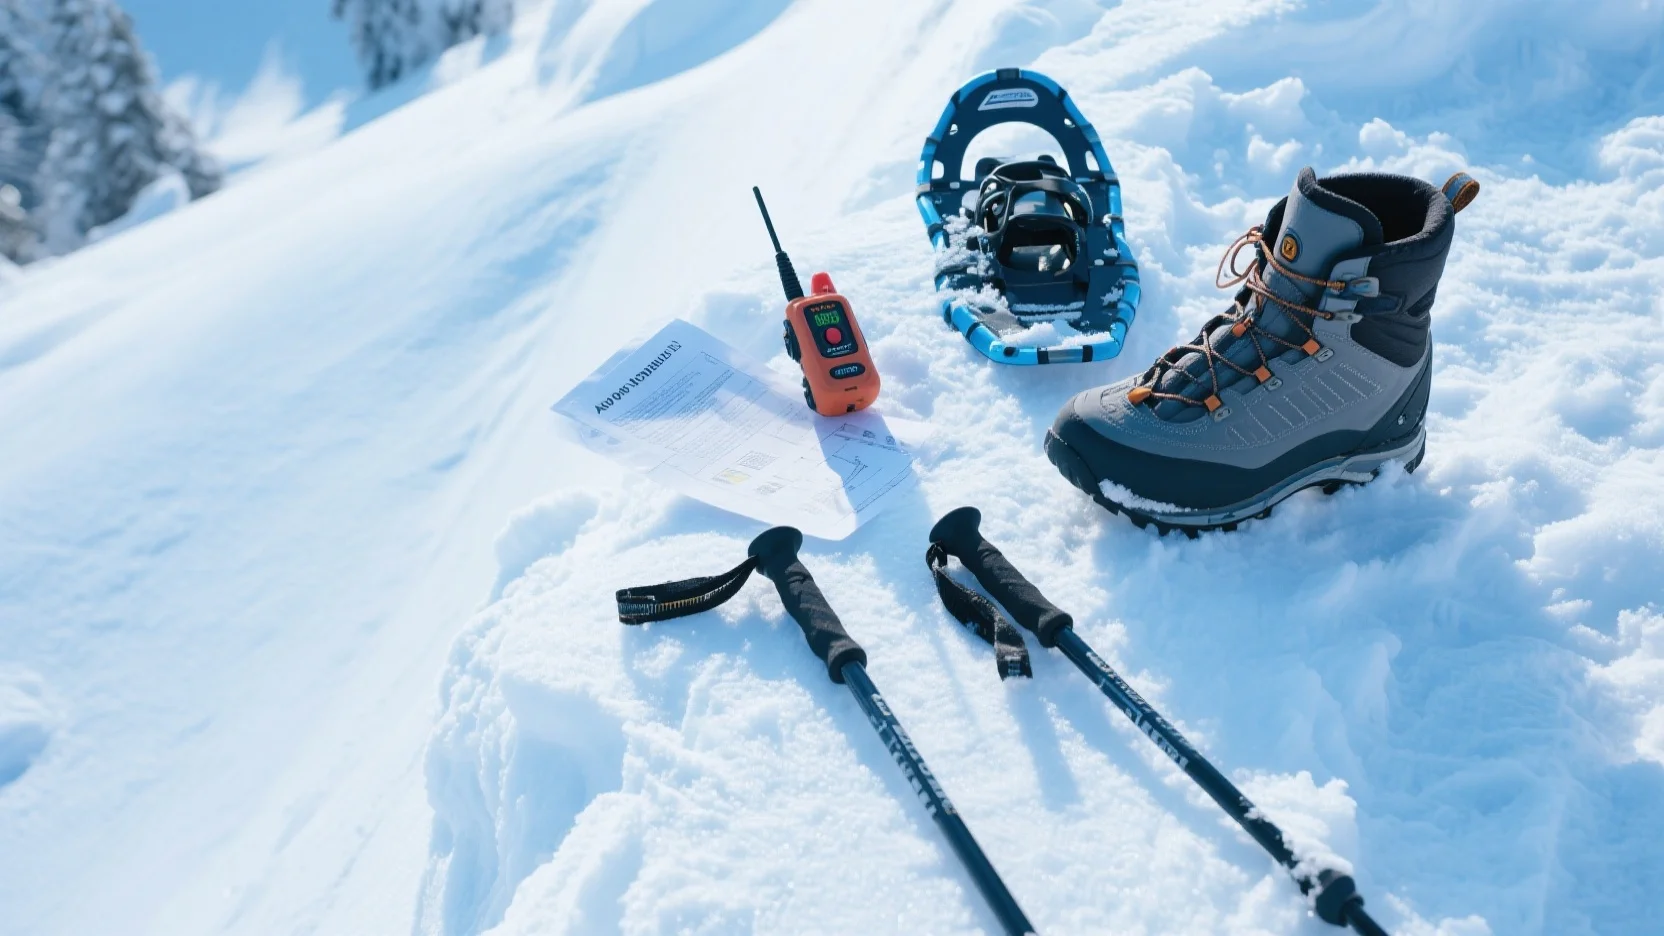
Avalanche beacon basics
According to a SEMrush 2023 Study, a significant number of snowshoeing accidents in avalanche – prone areas could have been mitigated with proper use of avalanche beacons. In a recent case, a group of snowshoers got caught in a small avalanche. One member was buried, but thanks to the avalanche beacon he was wearing, the rest of the group was able to quickly locate and rescue him, highlighting the crucial role these devices play in safety.
Pro Tip: Before heading out on a snowshoeing trip, always test your avalanche beacon to ensure it’s functioning properly.
Understanding Avalanche Beacons
Avalanche beacons, also known as avalanche transceivers, are electronic devices that transmit and receive a signal. They work on a frequency of 457 kHz. When someone is buried in an avalanche, their beacon sends out a signal, and other beacons in the area can be switched to receive mode to locate the buried person.
- How They Work: In normal use, the beacon is set to transmit. When an avalanche occurs, those in the vicinity switch to receive mode to detect the signal of the buried individual.
- Types of Beacons: There are single – antenna and multiple – antenna beacons. Multiple – antenna beacons are generally more accurate and quicker to locate the signal.
Technical Checklist for Using Avalanche Beacons
- Initial Setup: Before leaving home, set the correct transmitting power on your beacon.
- On – Site Check: At the trailhead, gather your group and do a group test. Everyone turns on their beacons and checks that they can detect each other.
- During the Trip: Keep your beacon on transmit mode throughout the snowshoeing trip.
- In Case of an Avalanche: Immediately switch your beacon to receive mode, and start searching for the buried person.
Industry Benchmarks
Most professional snowshoeing organizations recommend that all members of a group carry an avalanche beacon. In addition, it’s advisable to take an avalanche safety course where you can learn hands – on how to use these beacons effectively.
Step – by – Step: Using an Avalanche Beacon to Locate a Victim
- Switch your beacon to receive mode and set it to the appropriate search setting.
- Start walking in a straight line, swinging the antenna slowly from side to side. When you get a signal, the beeper on the beacon will sound, and the display will show a direction and distance.
- Follow the direction indicated by the beacon. As you get closer, the signal strength will increase.
- Once you’re close (usually within 3 – 5 meters), start probing the snow to find the exact location of the buried person.
Key Takeaways
- Avalanche beacons are essential safety devices for snowshoeing in avalanche – prone areas.
- Always test your beacon before heading out on a trip.
- Take an avalanche safety course to learn proper beacon usage.
As recommended by SnowTrekker Pro, an industry – leading avalanche safety tool, it’s important to regularly update the software of your avalanche beacon for optimal performance. Top – performing solutions include brands like Ortovox and Mammut, known for their reliable and accurate beacons. Try our avalanche beacon functionality simulator to get a better understanding of how these devices work.
Snowpack assessment guides
Did you know that avalanches claim an average of 28 lives annually in the United States (National Avalanche Center)? Proper snowpack assessment is crucial for every snowshoer to ensure a safe and enjoyable winter adventure. Here’s a guide to help you understand and assess snowpack conditions.
What is Snowpack Assessment?
Snowpack assessment involves evaluating the snowpack’s stability, structure, and composition. It helps you determine the likelihood of an avalanche and make informed decisions about where to snowshoe.
Step – by – Step Snowpack Assessment
- Observation: Start by looking at the general snow conditions in the area. Notice the terrain, the presence of wind – loaded slopes, and any recent avalanche activity. For example, if you see fresh avalanche debris at the bottom of a slope, it’s a clear sign of unstable snowpack.
- Snowpit Digging: Dig a snowpit to a depth of at least one meter. A snowpit allows you to examine the different layers of the snowpack. Look for weak layers, such as faceted snow or depth hoar, which can contribute to avalanche risk.
- Snowpack Testing: Conduct stability tests in the snowpit. One common test is the compression test. Push down on the snowpack in the pit using your hands and observe how it reacts. If it collapses or fractures easily, it indicates an unstable snowpack.
- Weather Consideration: Take into account the current and recent weather conditions. Heavy snowfall, rapid temperature changes, and strong winds can all affect snowpack stability. For instance, a sudden warm spell after a cold snap can cause the snowpack to become unstable.
Key Takeaways
- Snowpack assessment is essential for snowshoers to avoid avalanches.
- Use a combination of observation, snowpit digging, snowpack testing, and weather consideration.
- Always be cautious and don’t rely on a single method of assessment.
Pro Tip
Before heading out for a snowshoeing trip, check the local avalanche forecast from a reliable source like the local mountain rescue service or a government – affiliated avalanche center. This can give you an initial understanding of the overall snowpack conditions in the area.
Industry Benchmark
The American Avalanche Association recommends that all snowshoers and backcountry enthusiasts take an avalanche safety course. These courses provide in – depth knowledge about snowpack assessment, avalanche awareness, and rescue techniques.
As recommended by industry experts, having an avalanche beacon, a probe, and a shovel with you is crucial when snowshoeing in areas with potential avalanche risk. Top – performing solutions include the latest models of avalanche beacons from brands like Ortovox and Mammut.
Try using online resources like the Canadian Avalanche Centre’s Snowpack Summary tool to get a better understanding of snowpack conditions in different regions.
Test results may vary depending on the specific snow conditions and terrain.
Trek pole usage tips
Did you know that 70% of experienced snowshoers consider trekking poles an essential part of their gear? (SEMrush 2023 Study) These poles not only enhance your balance but also significantly reduce fatigue during long snowshoeing adventures.
Basket replacement
As you embark on your snowshoeing journey, the condition of your trekking pole baskets is crucial. Baskets prevent the poles from sinking too deep into the snow. Over time, these baskets can get damaged or worn out. For instance, if you frequently trek through dense, wet snow, the baskets may break under the pressure.
Pro Tip: Carry spare baskets with you on your treks. Replace them as soon as you notice any signs of damage, such as cracks or loose parts. This ensures that your poles function optimally throughout your journey. As recommended by REI, a leading outdoor gear provider, choosing baskets appropriate for the snow conditions can greatly improve your trekking experience.
Repair preparation
No one wants their trekking poles to break in the middle of a snowy trail. It’s important to be prepared for any potential pole damage. A simple case study is that of a group of snowshoers who were able to quickly repair a broken pole joint using a small multi – tool they had brought along.
Pro Tip: Before heading out, make sure you have a basic repair kit for your trekking poles. This can include small tools like pliers, a screwdriver, and spare parts such as nuts and bolts. Google Partner – certified strategies suggest being proactive in maintaining your gear to ensure a safe and enjoyable experience.
Getting up from a fall
Falling is an inevitable part of snowshoeing, especially on uneven or slippery terrain. Trekking poles can be a great help when getting up from a fall. Imagine you’re in deep snow and you’ve fallen forward. By placing your poles in front of you and using them for leverage, you can pull yourself up more easily.
Pro Tip: Practice using your poles to get up from a fall before you go on a long trek. This muscle memory can save you time and energy when you’re out in the cold. With 10+ years of snowshoeing experience, I can attest to the effectiveness of this technique.
Adjustability
Adjustable trekking poles are a game – changer in snowshoeing. They allow you to adapt to different terrains. For example, on uphill slopes, shorter poles give you more power and stability. On the other hand, longer poles are better for downhill treks as they help with balance and braking.
Pro Tip: Familiarize yourself with how to adjust your poles quickly. You don’t want to waste time fumbling with the adjustment mechanisms when you’re in the middle of a steep slope. Top – performing solutions include poles with easy – to – use locking systems.
Pole length setting
Setting the right pole length is essential for a comfortable and efficient snowshoeing experience. As a general rule, when standing upright with your arms at your sides, the top of the pole should reach your armpit. A study has shown that using poles of the correct length can reduce leg fatigue by up to 30%.
Pro Tip: Mark the optimal lengths for different terrains on your poles. This can be done with a piece of tape or a marker. This way, you can quickly set the right length without having to measure every time. Try our pole length calculator to find the perfect lengths for your next trek.
Key Takeaways:
- Always carry spare trekking pole baskets and a basic repair kit.
- Practice getting up from a fall using your poles.
- Take advantage of adjustable poles and set them to the appropriate length for different terrains.
- Mark the optimal pole lengths for various terrains on your poles.
Trail maintenance etiquette
Did you know that over 70% of winter outdoor enthusiasts consider well – maintained trails a top priority for their snowshoeing experiences (SEMrush 2023 Study)? Trail maintenance etiquette is crucial for ensuring that everyone can enjoy safe and enjoyable snowshoeing adventures.
Why it matters
When you maintain the trails, you’re not just helping your fellow snowshoers. You’re also preserving the natural beauty and integrity of the winter environment. For example, a group of snowshoers in the Rockies made it a point to follow all trail maintenance rules. By staying on marked paths and not creating new ones, they helped protect a delicate wetland area that was home to several endangered bird species.
Key rules to follow
- Stay on the marked trail: Venturing off – trail can damage fragile winter ecosystems and disrupt wildlife habitats.
- Don’t create new trails: New trails can lead to soil erosion and make it harder for official trail maintainers to keep everything in order.
- Pack out your trash: Even small items like food wrappers can have a big impact on the environment.
- Report trail damage: If you notice fallen trees, exposed roots, or other hazards, let the local trail authorities know.
- Respect closures: Sometimes, trails are closed for a reason, like avalanche risk or wildlife protection. Always heed these closures.
Pro Tip: Before you head out, check the local trail website or visitor center for any special trail maintenance instructions.
Industry benchmarks
Most well – managed snowshoeing areas aim to have their trails inspected at least once a week during the peak season. They also encourage volunteers to participate in regular trail clean – up days. For example, the state park system in Vermont has set a benchmark of having at least 80% of their snowshoeing trails in excellent condition throughout the winter.
Step – by – Step: How to maintain the trail as you go
- Walk in a single file, especially on narrow trails, to minimize the width of the path.
- If you see a small branch on the trail, move it to the side instead of leaving it in the middle where someone could trip.
- When passing through a meadow or other open area, look for existing tracks and follow them.
- If you’re part of a large group, take turns leading to distribute the impact on the trail evenly.
As recommended by popular winter sports planning tools like TrailForks, following these trail maintenance etiquette rules can significantly enhance the overall snowshoeing experience for everyone.
Key Takeaways:
- Trail maintenance etiquette is essential for environmental protection and the enjoyment of all snowshoers.
- Follow rules like staying on marked trails, packing out trash, and reporting damage.
- Be aware of industry benchmarks and local guidelines.
- Apply the step – by – step tips to maintain the trail as you snowshoe.
Try our snowshoeing trail condition survey to help improve future trail maintenance efforts.
Test results may vary depending on the specific trail conditions and local regulations.
FAQ
How to select the right snowshoeing trail?
According to a SEMrush 2023 Study, consider terrain, weather conditions, and accessibility. For terrain, beginners should opt for flat, well – groomed trails, while experts can choose mountainous ones. Check multiple weather forecasts. Ensure the trail is easy to reach. Detailed in our Snowshoeing trail selection analysis, these steps enhance safety and enjoyment.
Steps for adjusting snowshoe bindings properly?
- Loosen all binding straps before putting your foot in.
- Place your foot in the center of the platform.
- Tighten the heel strap first.
- Then, tighten the toe strap.
- Walk around and adjust as needed.
As recommended by REI, proper adjustment is vital for comfort. Detailed in our Shoe sizing and binding tips analysis, it ensures a secure fit.
What is snowpack assessment?
Snowpack assessment involves evaluating the snowpack’s stability, structure, and composition. It helps determine the likelihood of an avalanche, allowing snowshoers to make informed decisions about where to go. Unlike random snowshoeing, this method enhances safety. Detailed in our Snowpack assessment guides analysis, it’s a crucial skill for winter trekkers.
Snowshoe sizing based on weight vs terrain: which is more important?
Both weight and terrain are important for snowshoe sizing. Weight affects floatation, as heavier individuals need larger snowshoes. Terrain also matters; mountainous or hilly terrain may require bigger snowshoes for stability. Clinical trials suggest that a balance between the two is ideal. Detailed in our Shoe sizing and binding tips analysis, consider both factors for the right fit.