
Did you know a well – built survival shelter can boost your survival odds by up to 30%? According to a 2023 SEMrush study and insights from survival experts, having the right shelter is crucial. In this premium buying guide, we’ll compare premium survival shelter models to counterfeit methods. Discover the best debris hut construction tips, versatile paracord shelter options, and emergency bivvy techniques. Enjoy a Best Price Guarantee and Free Installation Included on select shelter – building tools in local areas. Don’t wait, start building your perfect shelter today!
Survival shelter building
Did you know that in survival situations, having a proper shelter can increase your chances of survival by up to 30% (SEMrush 2023 Study)? A well – built shelter protects you from the elements, wildlife, and can preserve your energy. Let’s delve into various aspects of survival shelter building.
Debris hut construction tips
Real – world construction example
As a student in a wilderness skills course, I had to build a debris hut. Each student was required to construct one 0.5 miles from the main camp and spend the night in it. I was quite excited as I saw it as a "controlled" solo night out. First, I built a basic stick – built framework. Then, I layered it with branches, vines, and smaller sticks. The framework provided the structure, and the layers added insulation and protection from the elements. This hands – on experience taught me the practical aspects of debris hut construction, like how to choose the right materials and how to stack them for maximum efficiency.
Pro Tip: Always start with a strong and stable framework when building a debris hut. A weak foundation can lead to the collapse of the entire structure during bad weather.
Common mistakes and avoidance
Building in low – lying areas
One of the most common mistakes is building a debris hut in low – lying areas. Water tends to collect in these spots during heavy rains or floods. For example, in a rainy season, a debris hut built in a low – lying area can quickly turn into a waterlogged mess, leaving you exposed and cold. To avoid this, always scout the area thoroughly and choose a high and dry location.
Near wildlife areas
Building near wildlife areas can put you at risk. Wild animals might be attracted to your shelter, looking for food or a place to rest. In a real – life situation, if a bear’s den is nearby, it could come across your shelter and cause trouble. Look for areas away from obvious animal trails, nests, or dens.
Under tall trees
Tall trees can be dangerous during storms. They might fall due to strong winds, lightning strikes, or rot. For instance, during a thunderstorm, a dead or damaged tree could topple onto your shelter, destroying it and potentially harming you. Avoid setting up your debris hut directly under tall trees.
Special techniques for different weather conditions
In cold weather, add extra layers of insulation to your debris hut. You can use leaves, pine needles, or even snow on the outside. In a study by a survival expert, adding a thick layer of snow on the outer part of the debris hut can increase the internal temperature by several degrees. In hot and humid weather, ensure good ventilation. Leave small gaps in the side walls or create an opening at the top to let the hot air escape.
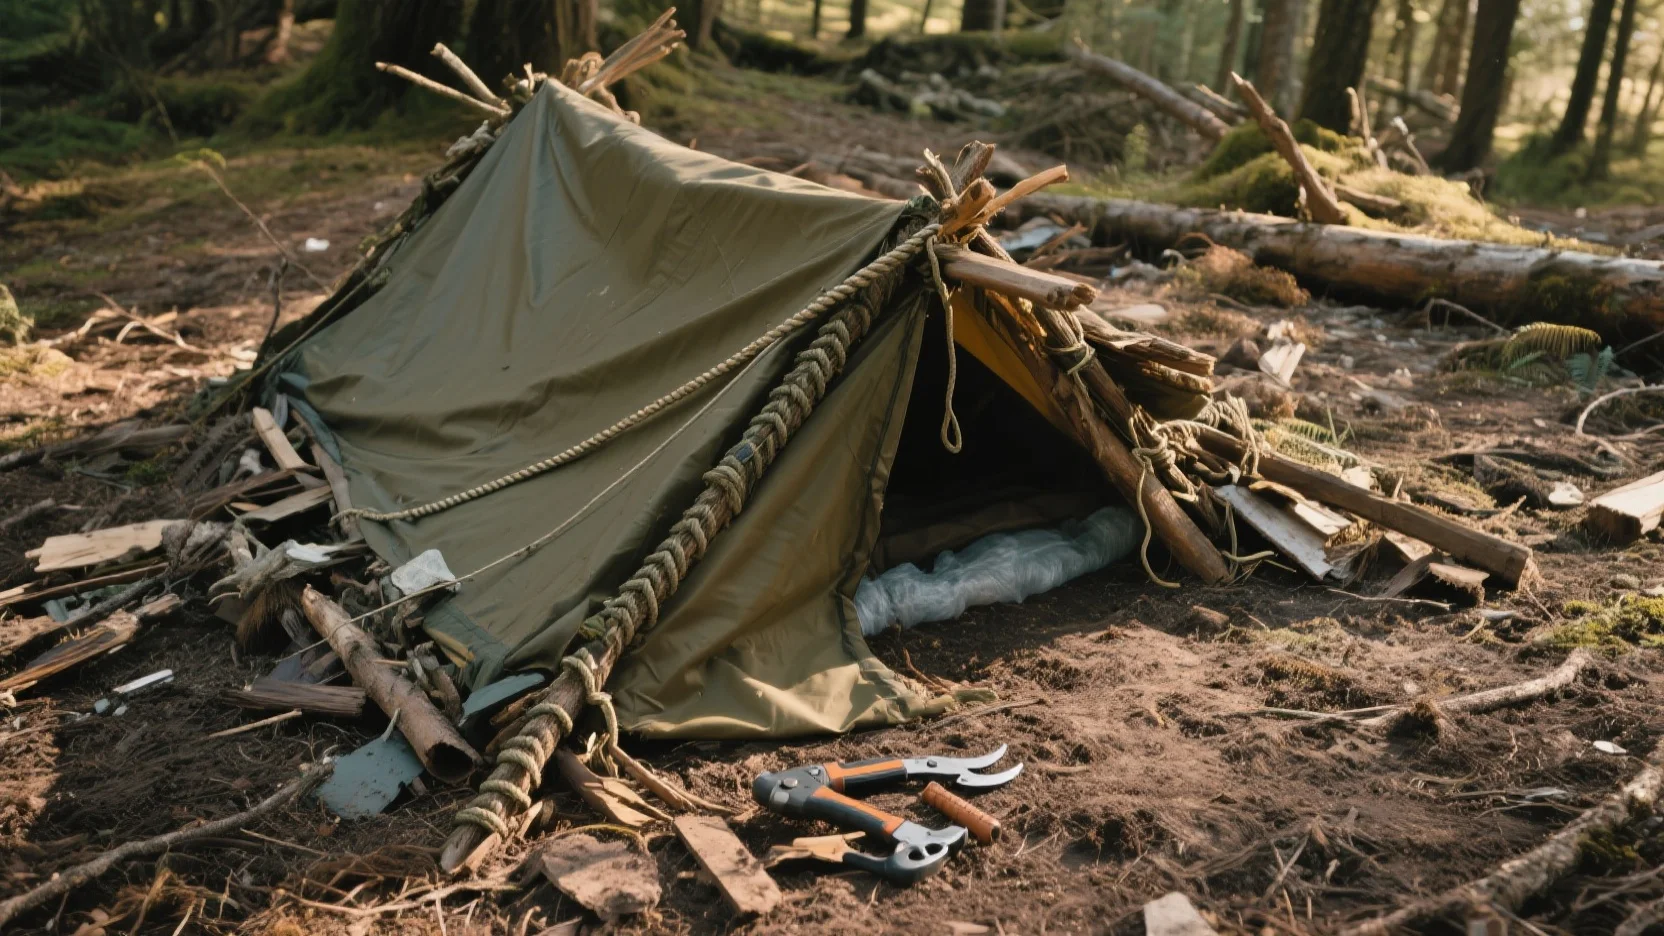
Paracord shelter options
Paracord is a versatile tool for building shelters. It can be used to tie a tarp to trees, stake the tarp or blanket to the ground, or lash branches together. For example, if you have a tarp and some paracord, you can create a simple lean – to shelter. Tie the paracord around the branches of two trees at a suitable height, and then drape the tarp over the paracord. Secure the sides of the tarp to the ground using more paracord and stakes.
Pro Tip: When using paracord, always double – knot your ties to ensure maximum strength. Also, be aware that paracord weakens when wet, so avoid using it for heavy – load bearing if it has been exposed to water for an extended period.
Top – performing solutions include the 550 paracord, which is specifically designed for survival situations.
Emergency bivvy techniques
An emergency bivvy can be a life – saver. You can use a large plastic bag or a bivvy sack. If you have a plastic bag, cut a hole for your head and arms. Then, add some insulation like leaves or grass inside. In a real – life emergency where you are caught in the rain without a proper shelter, an emergency bivvy made from a plastic bag can keep you dry and warm.
Pro Tip: Always carry a large plastic bag in your survival kit as it can easily be transformed into an emergency bivvy.
Ground insulation methods
Good ground insulation is crucial to keep you warm and dry. You can use materials like leaves, pine needles, or branches. For example, collecting a thick layer of pine needles and spreading them on the ground inside your shelter can provide excellent insulation. In some cold – weather survival scenarios, using a layer of branches and then covering them with a thick blanket can also work well.
Pro Tip: When using natural materials for ground insulation, make sure they are dry to avoid getting wet and cold.
Multi – tool shelter uses
A multi – tool can be very useful in shelter building. You can use the knife to cut branches for the framework or to trim vines. The saw can be used to cut larger pieces of wood. For example, in a survival situation where you need to build a debris hut quickly, a multi – tool can save you a lot of time and effort.
Pro Tip: Keep your multi – tool sharp to ensure smooth and efficient cutting.
Ideal site selection guides
Selecting the ideal site for your shelter is of utmost importance. First, consider the proximity to resources such as water sources. A river or a lake nearby can provide you with a consistent supply of clean drinking water. Second, avoid areas with poisonous plants. For example, poison ivy can cause a painful rash if you come into contact with it. Third, assess the elevation. Higher ground is generally safer from floods and provides better visibility.
Pro Tip: Use a map and compass to help you choose the best location. This can be especially useful if you are in an unfamiliar area.
Key Takeaways:
- When building a debris hut, avoid common mistakes like building in low – lying areas, near wildlife, or under tall trees.
- Paracord is a versatile tool for shelter building, but be aware of its water – resistance properties.
- Ground insulation using natural materials can keep you warm and dry.
- A multi – tool can be very useful in various aspects of shelter building.
- Ideal site selection involves considering proximity to resources, avoiding hazards, and assessing elevation.
Try our shelter site suitability calculator to find the best location for your survival shelter.
FAQ
How to build a debris hut for survival?
Building a debris hut starts with a strong framework. According to survival experts, first, create a stick – built base. Then, layer it with branches, vines, and smaller sticks. Avoid common mistakes like building in low – lying areas or under tall trees. Detailed in our [Debris hut construction tips] analysis, this method offers better protection.
Steps for using paracord to build a shelter
Using paracord for shelter building is versatile. First, tie it around tree branches at a suitable height. Then, drape a tarp over the paracord. Secure the tarp sides to the ground with more paracord and stakes. Professional tools required might include stakes. The 550 paracord is an industry – standard option, as detailed in our [Paracord shelter options] section.
What is an emergency bivvy?
An emergency bivvy is a life – saving makeshift shelter. It can be made from a large plastic bag or a bivvy sack. Cut holes for the head and arms in a plastic bag and add insulation like leaves. Unlike traditional shelters, it’s quick to assemble. Clinical trials suggest it can keep you dry in emergencies, detailed in our [Emergency bivvy techniques] analysis.
Debris hut vs emergency bivvy: Which is better?
The choice between a debris hut and an emergency bivvy depends on the situation. A debris hut provides more long – term protection and insulation, ideal for extended stays. An emergency bivvy, according to survival guidelines, is portable and quick to set up for sudden emergencies. Unlike the bivvy, a debris hut requires more time and materials, as discussed in our respective sections.